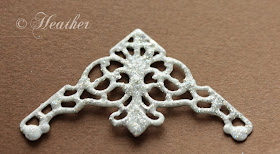
A few people have made comments and/or asked questions about my colouring of metal corners with nail polish so I thought I would do a quick tutorial
The corners before, the gold ones I think are a little tinny, the silver are better but still look a little 'cheap'
You can use any acrylic paint, I have both adirondak paint dabbers and the tubes you get at the local craft shop or DIY.
These are the ordinary nail polishes I use, the white is plain and the pink has a metallic finish.
These are the corners with just one coat each -
The top is acrylic paint
The middle is white nail polish
The bottom one is a metallic nail polish
The top is acrylic paint
The middle is white nail polish
The bottom one is a metallic nail polish
I've tried to show the sheen you get on the one painted with Nail polish but didn't manage to photograph it very well.
The top corner here was painted with one coat of white nail polish and then some irridescent polish, the other two were given one coat each of a metallic nail polish.
This is the irridescent one where I hoped to show you the sparkle but again not photographing well.
I find nail polish gives a better covering which is more durable than acrylic paint - it doesn't scuff , scratch and flake or wear away so easily. I wouldn't use it for everything, certainly if I wanted to colour and distress metal corners etc. I would go for Uncle Tim goodies. It is though a very quick and easy and effective way or treating metal embellishments you wish to re-colour.
I hope some of you find this quick tutorial useful and decide to give it a try.


Hey girl! Did you get my email? Just let me know!
ReplyDeleteWhat a great idea! Love the nailpolish part!
Hugs, Dena
Fabulous tutorial, Thank you so much for sharing, now where do I get the gorgeous corners? LOL Gay xxx
ReplyDeleteoh! lol. You have had that nail varnish out again!!!! What a Fabulous idea. LOVE it.
ReplyDeleteChrissyxx
Thank you
oh! lol. You have had that nail varnish out again!!!! What a Fabulous idea. LOVE it.
ReplyDeleteChrissyxx
Thank you
Ohhhh Heather thanks for this info very useful...I have used the piant dabbers & found it flaked off..looks like I need to go shopping for some cheap N/varnish now..dont know how much more stash me craft room can take..LOL
ReplyDeletesmiles Christine xx
Ooh thanks for the useful info. I need to go to the shops and nail varnish.
ReplyDeleteKathleen x
Thanks Heather - I imagined something way more complicated. Now I know what to do with my languishing nail varnish bottles.
ReplyDeletePaula (PEP)
Great Idea!
ReplyDeleteThank you Heather!
I'll try it!
LG Nela
Hi hun
ReplyDeleteoh wow they look fabulous, you is so clever, thanks for the tutorial, sue,x
Fab tip Heather, must give it a try!
ReplyDeleteHugs, Barbaraxx
Beautiful corners......you clever gal you......
ReplyDeleteHugs
Sue
Ohhhhhh...this is BRILLIANT...will have to buy nail polish! I especially love the iridescent one!
ReplyDeleteThank you for sharing such a clever idea!!!
Such a simple technique but so very effective. It looks almost enamelled. Brilliant idea.
ReplyDeleteEdna x :)
Oooooh, I love this idea Heather! Looks really beautiful!
ReplyDeleteLove the card in your post below too, it's BREATHTAKINGLY STUNNING. A true masterpiece.
hugs,
Hanna
Great idea, Rica, I will surely give it a try! thanks for sharing.
ReplyDeletexox Julia Sáddi - Brazil